0
0  Login
Login 

Step 1: Types of Sprayers
You can choose from several types of paint sprayers such as airless paint sprayers, electric sprayers, HVLP sprayers, and even cordless options. The sprayer we often use is an HVLP (High Volume, Low Pressure) sprayer, which works by converting high pressure from an air compressor into lower pressure. This gives you better control of the paint flow and a smoother spray finish.
An HVLP sprayer is perfect for painting furniture, cabinets, and almost anything you would normally paint by hand.
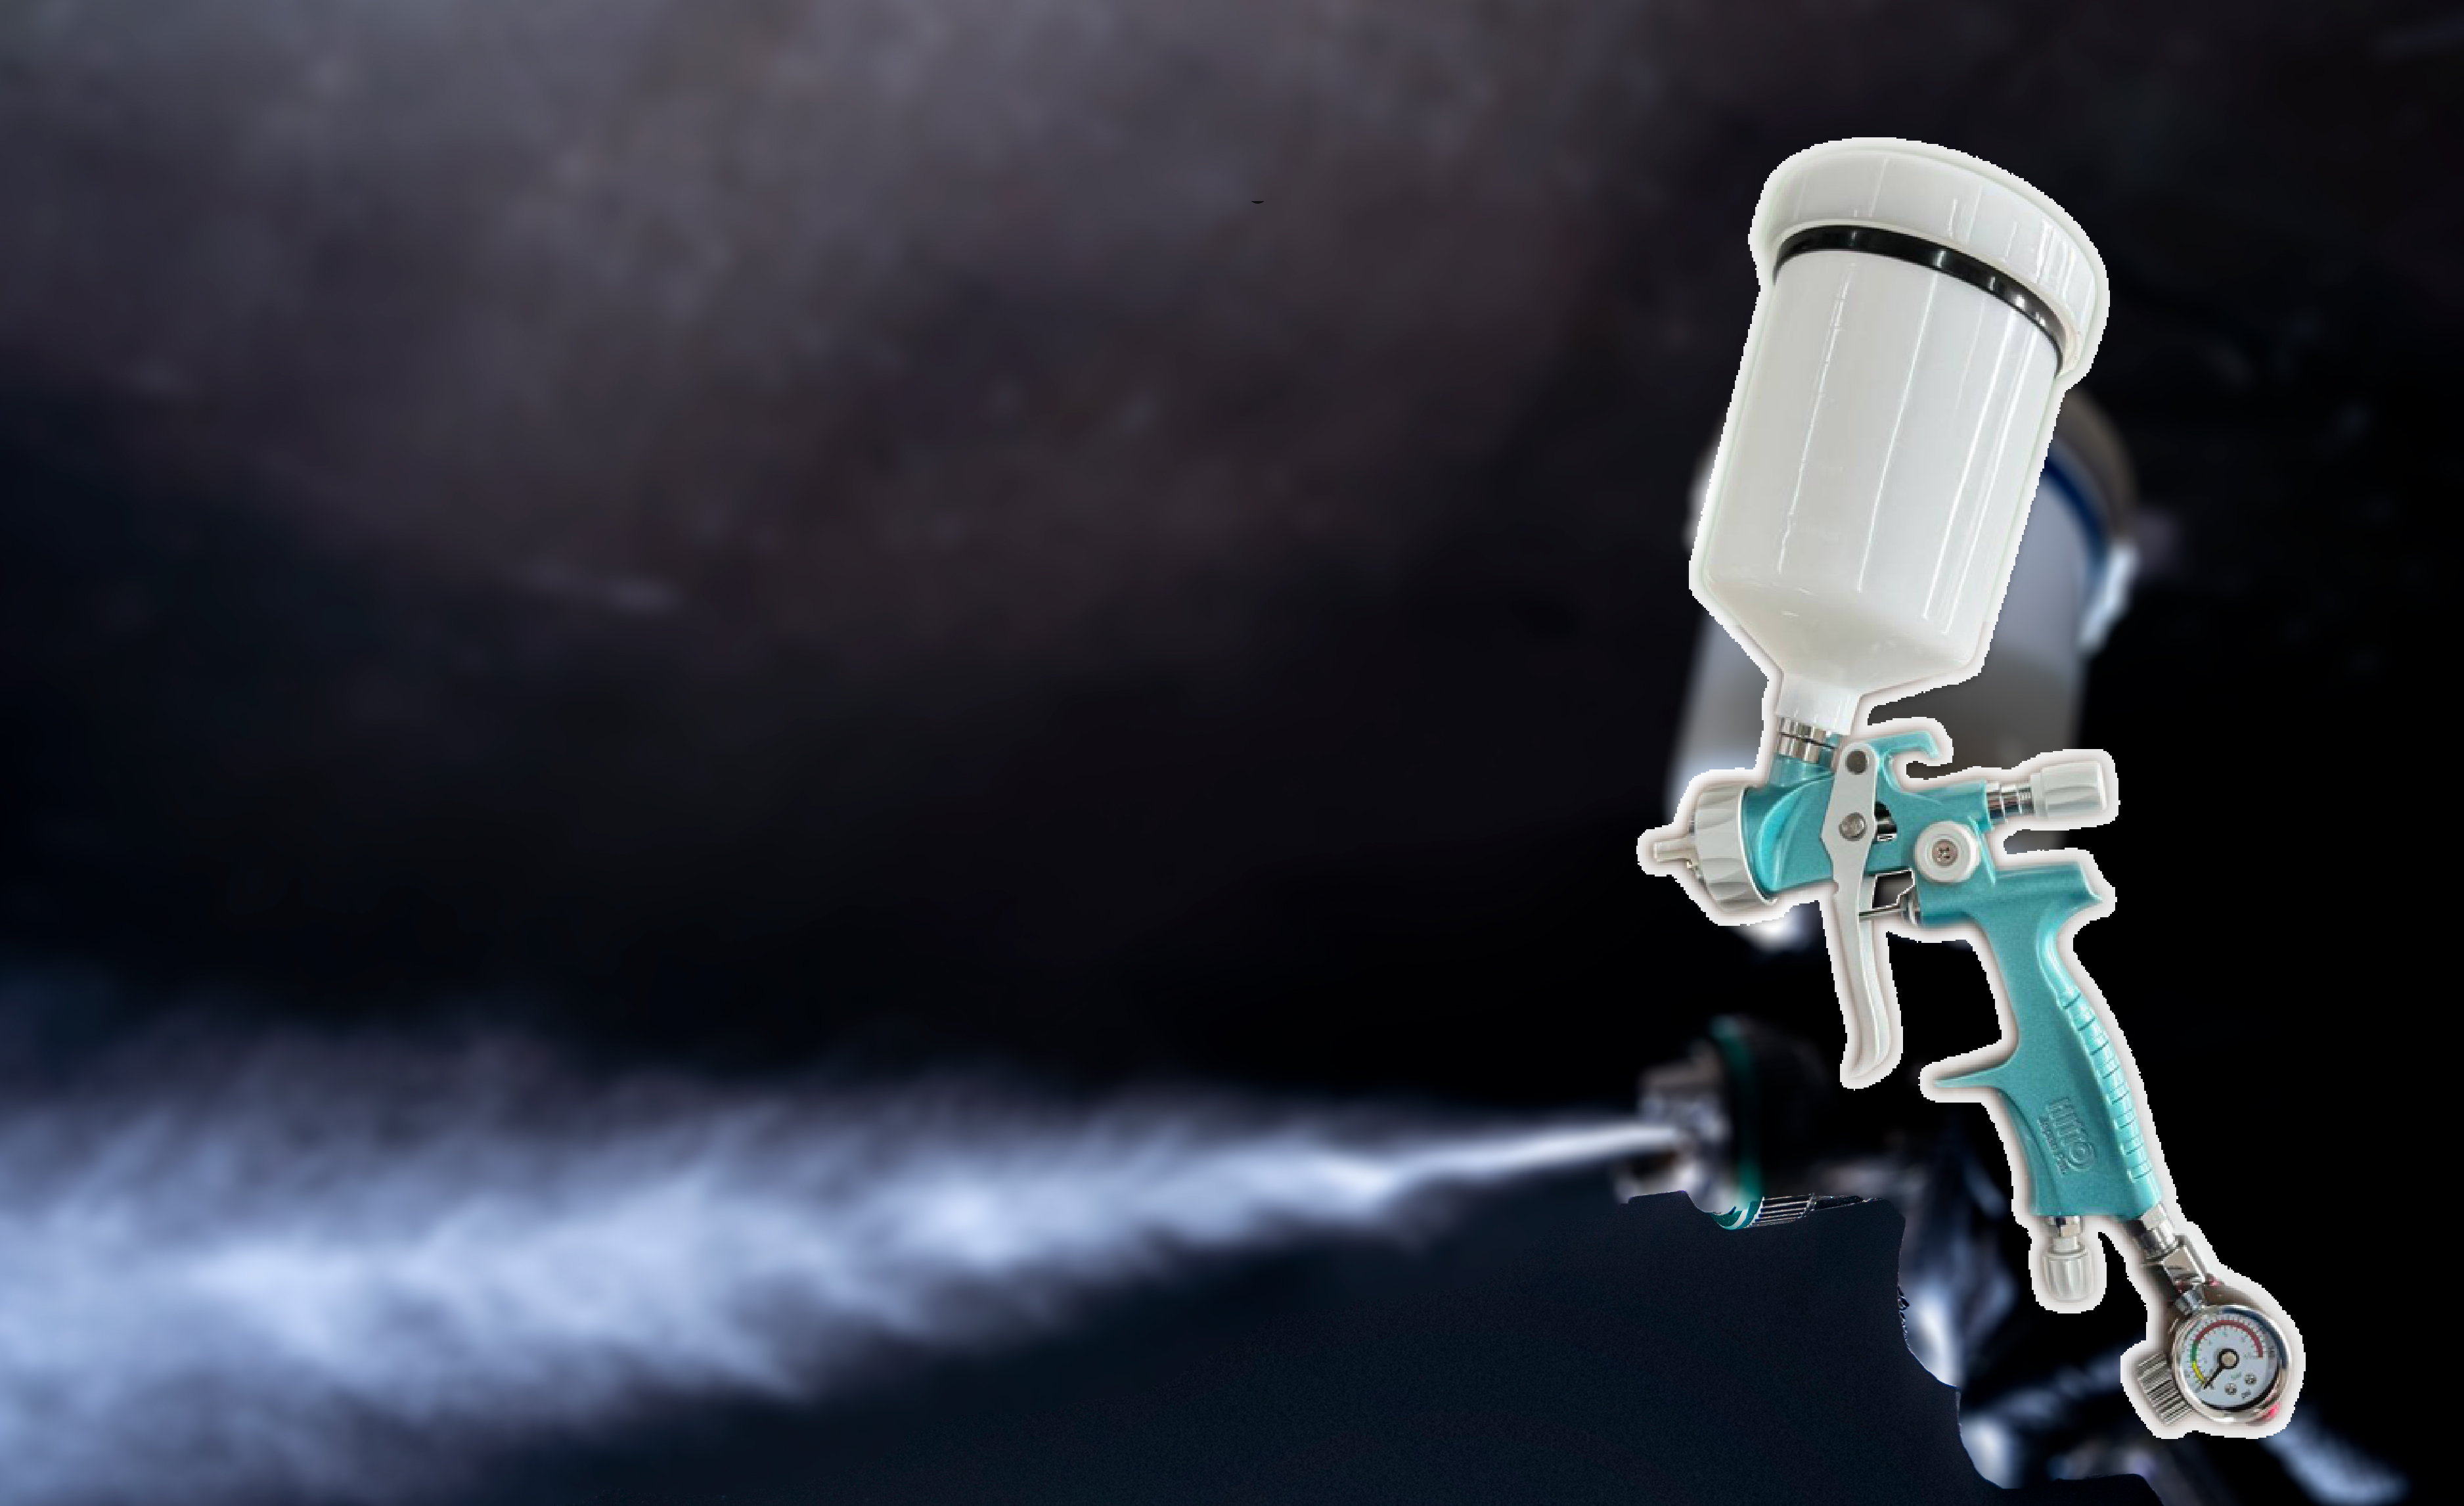
Although Hubs uses a professional Hitto paint gun with a 1.8 mm tip (Hitto HVLP Premium Automotive Spray Gun Set) he also got me a budget-friendly Vaper gun from Princess Auto. And you know what? The finish still looks professional even with the cheaper gun! So, you don’t need to overspend to get great results. For water-based paints, the Vaper gun comes with a 2.3 mm tip, which provides a wider opening that makes spraying easier and more consistent.
Step 2: Things to Keep in Mind
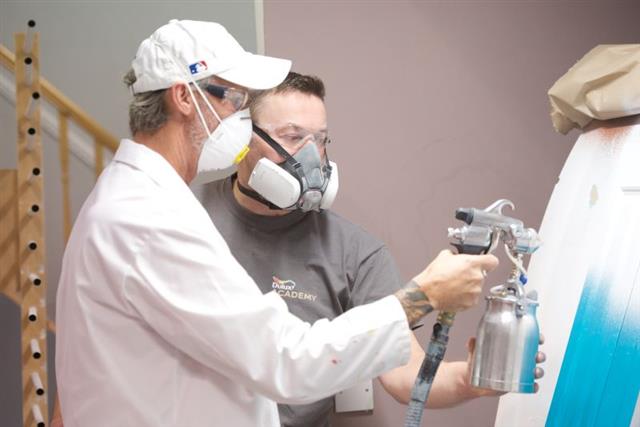
For this project, I’m practicing how to paint using Hub’s Hitto spray gun. A paint sprayer really speeds up any painting job! But before you start, here are four important tips to keep in mind:
-
Keep the nozzle perpendicular to the surface. If the spray gun is angled, the paint will not cover evenly. Always hold the gun straight up and down.
-
Maintain a distance of 6″–8″ between the nozzle and the surface for the best coverage.
-
Light trigger press = air only.
-
Full trigger press = air + paint.
We’ll explain this in more detail in the step-by-step guide below. But to really see these principles in action, check out the video tutorial on how to spray paint using a spray gun.
Some pegboards or wood panels come pre-finished on one side, but the one we’re using here is plain and has a shiny, almost waxy surface. That’s why we always lightly scuff-sand the surface and then remove the dust with a slightly damp rag.
Pro Tip: Sanding can cause static, which attracts dust back onto the surface right after you spray. To avoid this, always wipe away sanding dust with a barely damp cloth – or even repurpose an old cotton sock!
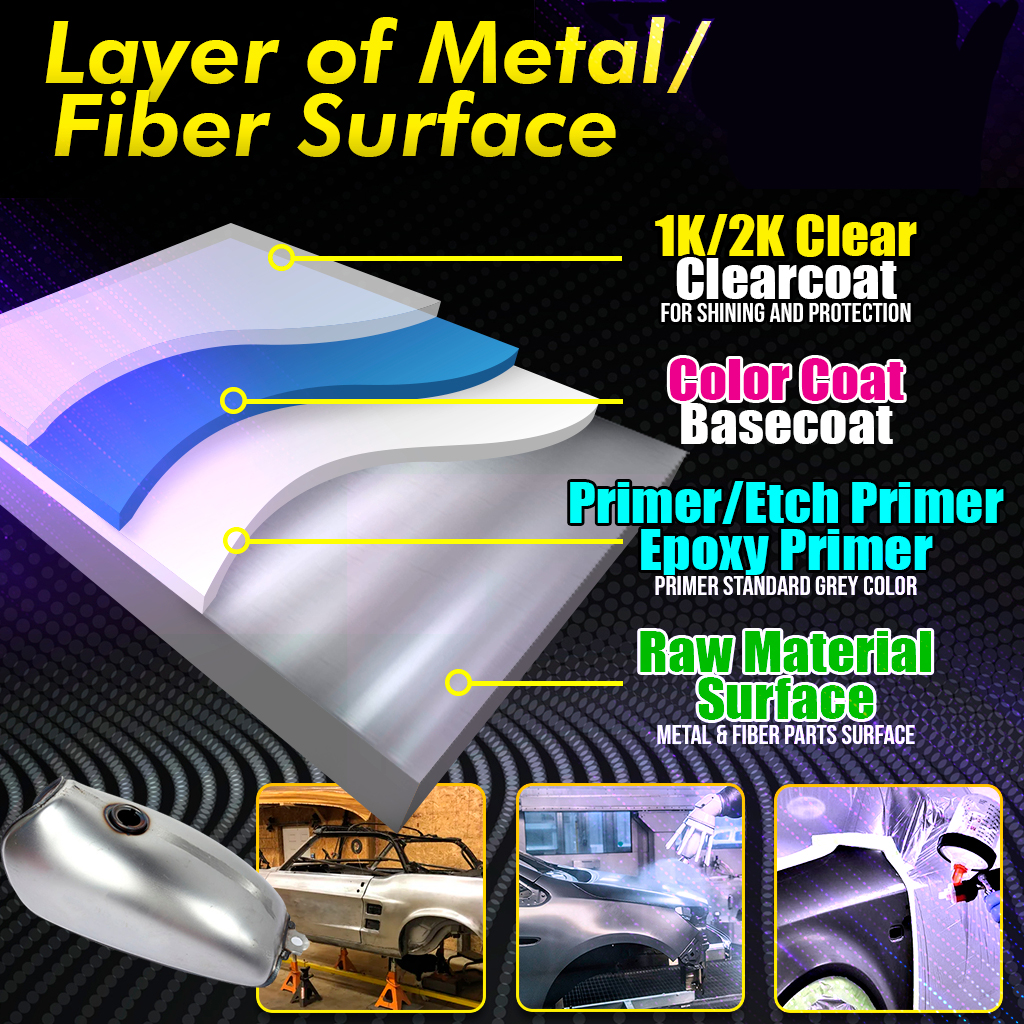
A Bit About Primer
Primer is crucial in some projects:
-
Mahogany or tannin-rich woods → These can bleed through paint (red or yellow streaks). Use a shellac-based primer like Zinsser B-I-N before spraying.
-
Bare wood → Always prime first for better adhesion and coverage.
-
Already painted or sealed surfaces → Sometimes you can skip primer, depending on the paint.
In this project, we’re using PPG BreakThrough paint, which often works fine without primer on pre-painted or sealed surfaces. But if you’re dealing with raw wood, always apply a primer coat. Once the primer is dry, give it another light scuff and clean off all dust before moving on.
Step 4: Use a Jig
When spray painting, it helps a lot to use a paint jig. A jig keeps your project elevated and stable so paint can reach all sides without messy spray-back.
Why use a jig?
-
It suspends your work on dowels → no paint transfer on the underside.
-
Adjustable to different project sizes.
-
Keeps your spraying area neat and reusable.
Types of Jigs
-
Configurable Jig (small projects):
Hubs drilled holes every inch using a drill press, so dowels can be placed anywhere depending on the size of the project. Perfect for small items, like the pegboard scrap we’re starting with. -
Corner Jig (large projects):
Only has holes on the 4 corners. Ideal for larger panels or boards.
Jig Maintenance Tips
-
Cover the jig base with kraft paper → prevents overspray clogging the unused holes.
-
Push dowels through the kraft paper to fit your project.
-
Wrap masking tape on top of the dowels → avoids paint buildup, so dowels last longer and still fit snugly in the holes.
Step 5: Strain Your Paint
- Tip: Always strain your paint to avoid spray gun clogs.Before pouring paint into your spray gun, run it through a paint strainer first. Even a tiny piece of debris or dried paint can block the nozzle and ruin your finish.In this case, since the paint is old and the can is rusty, we strain it twice:
- From the can into a clean container.
- From the container into the spray gun.Straining also helps you check if the paint is thin enough. If it flows smoothly through the filter, you’re good to go. If it drips too slowly, simply thin it with a bit of water (for water-based paint).
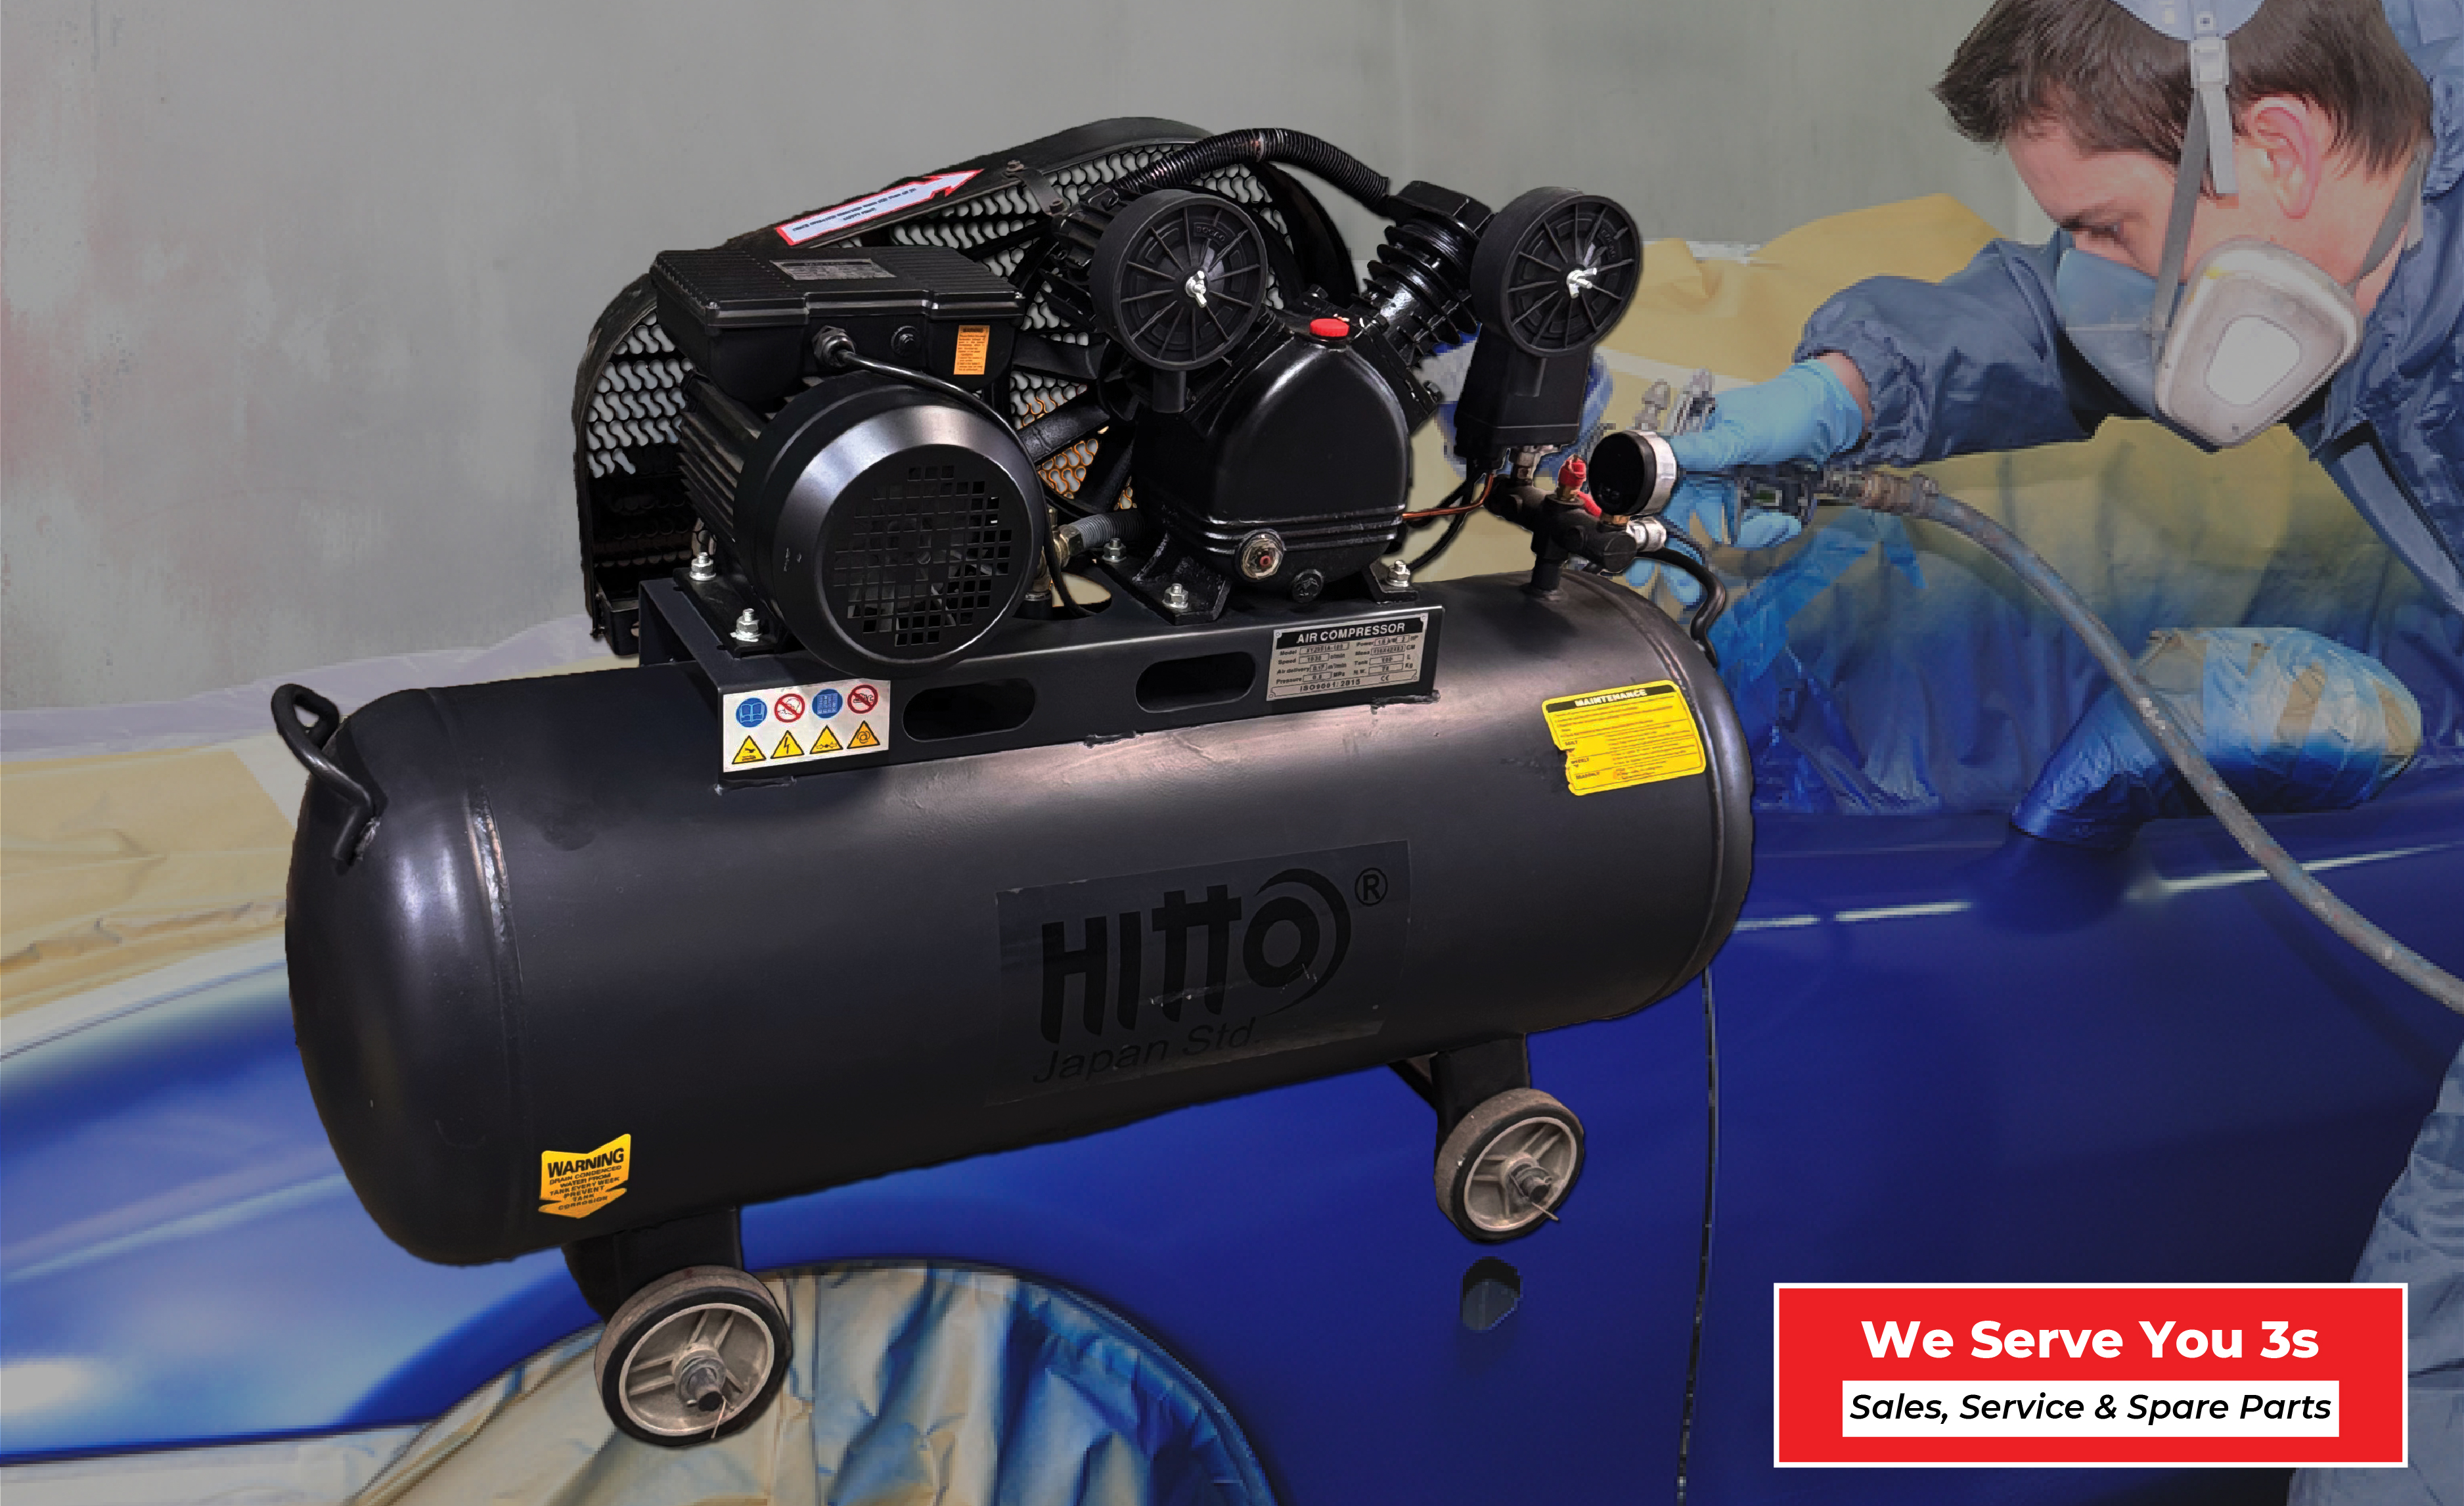
Step 6: Attach the Compressor
Tip: Always drain your compressor tank before use.
Unless you have a built-in filtering system, it’s important to release any water build-up by opening the valve at the bottom of your compressor tank. If not maintained regularly, rusty water can accumulate inside since most tanks aren’t coated on the inside.
- Plug in the compressor and allow it to reach full pressure.
- Set the pressure according to your spray gun’s manual.
- Connect the hose to your paint gun.
Some spray guns also come with their own pressure adjustment at the cup, so you can fine-tune it there as well. Adjust the spray pattern by opening or closing the nozzle.
⚡ Always test your spray on a scrap surface first to check the fan width and make sure the gun is spraying evenly before you start painting your actual project. You also can used the (Hitto Air Compressor's)
Step 7: Learning to Spray
Safety First: If you’re painting in a closed area, always wear a mask to avoid inhaling fumes.
Our Hitto cup gun has two adjustment knobs:
-
The bottom knob controls the trigger, regulating how much paint comes out.
-
The top knob adjusts the fan width, from a narrow line up to about 6".
As a guide: hold the gun about 6" away from the surface, and aim for a spray width roughly equal to the width of your hand (like using a 6" paintbrush).
Before starting your actual project, always test the spray on a scrap board to check both flow and fan width.
Paint Gun Technique
-
Begin with air only by lightly pressing the trigger – start off the project.
-
With the gun held 6" above the surface and kept perpendicular (straight, not angled), move steadily across the work.
-
As you reach the edge, fully press the trigger to release paint.
-
When you move off the other edge, ease up again so only air comes out.
-
Overlap each pass by about 50% to ensure smooth and even coverage.
Turn Yourself or the Work
-
Spray in one direction first.
-
Then rotate yourself, or the project, 90° and spray again in the opposite direction for full coverage.
-
A turntable makes this easier so you don’t have to keep repositioning yourself.
Be sure to watch the video at the beginning of this guide to see these techniques in action.
The last photos show the scrap pegboard before and during painting — my very first project using a paint gun!
-